How often should I turn my compost pile?
Once a week. This will continue to mix everything together and help aerate the pile. If the microbes deep within the pile don’t get enough oxygen,... More »
A compost pile is a great way to create your own fertilizer for free. It's also another way to recycle resources from your home instead of throwing them away.
Composting is one of the most beneficial things you can do for your yard, your garden and the environment. What better way to dispose of your fallen leaves and grass clippings, not to mention those kitchen scraps that would otherwise be thrown in the garbage. The great thing about starting a compost or leaf mold pile is that when you mix the right ingredients, in time, nature takes over and creates one of the most beneficial all-natural fertilizers. But it also provides the satisfaction of knowing that you’re keeping lawn waste out of the landfill.
Today, we’re going to build a compost bin out of 2x4 cedar lumber and some hardware wire cloth. We’re going to teach you some basic wood joinery techniques that will be useful in other home improvement projects. You’ll also learn about the basics of composting and getting the ingredients right so you can keep your compost pile going all seasonal long. So let’s get started.
The first thing you need to do is to pick up some cedar 2 x 4s at your local independent home improvement retailer. The staff there can help you select lumber that is straight and not twisted or warped. We’re using cedar because it is naturally rot and decay resistant. We’re using 8-foot long pieces because our compost bin will be a double bin that is 8-feet long and 3-feet high. From a construction standpoint, this length eliminates having too much waste. It’s also a length that is manageable hauling it in my vehicle. It’s always a good idea to sketch out your project first to take into account the ideal length of lumber you’ll need, as well as how many pieces you’ll need so you can get everything in one trip.
In this project, we’re going to make a double bin, so we can use one side for compost and the other side for leaf mold. Most people have heard of compost, but not as many know about leaf mold. Leaf mold is simply decayed leaves. It’s a great soil conditioner and is full of nutrients that are beneficial for your garden.
We’ll start by building the large panels that will be used for the front and back of the bin. Since our bin is 8-feet long, we don’t have to cut the long pieces to length. So we’ll start by cutting the shorter pieces to length using a miter saw. If you don’t have a miter saw, you can also use a circular saw or even a hand saw. We chose a height of 3 feet for our bin because it’s the length of our hardware wire cloth.
We’re going to make something called a lap joint on each of the ends of both our 8-foot and 3-foot pieces. The lap joint is one of the most basic wood joints. It’s where halve of each piece is cut away so the two boards, when joined together, maintain the same thickness as the rest of the board. We could just screw our boards together without going to all the trouble to make this joint, but it probably wouldn’t last as long. The beauty of the lap joint is that it provides plenty of surface area for our construction adhesive, which will help our bin withstand the elements for years to come.
There are several ways you can make this joint. The first method is to remove the wood on each 2x4 using a hand saw and a chisel. First, using the width of a scrap piece of 2 by 4, mark the area on the end of the 2 by 4 that will be removed like you see here. Then, using a handsaw, make a cut on this mark ¾ inches deep. Next, place the board in a vice to hold it securely. On the end of the 2 by 4, make a mark ¾ inches from the side of the piece. Mark one end, then the other, and draw a line between the two marks. This line should run through the exact center of the end of the board. Using a 1” wood chisel, split the the board on this mark down to the saw line you cut previously . The piece to be removed should split right off. Make sure you are wearing safety glasses and thick work gloves for this step.
You can also make this joint easily on a table saw. Just set the depth of your blade to ¾” and, using your miter gauge, remove the stock making multiple passes, chipping away the area to be removed one cut at a time. This method will not work for the longer 8-foot pieces. They will tip out of the saw, creating a cutting hazard. Always be sure to read and follow the user’s manual that came with your table saw for safe operating procedures.
With your lap joints cut, now assemble your frames using construction adhesive and some 1-1/4” deck screws or stainless steel screws. Cut the wire hardware cloth with a pair of snips to fit the frames. It’s a good idea to bend the corners back before fastening with the galvanized wire staple fasteners. We’ll place a staple every 6" or so along all four edges of our frame.
Now it’s time to assemble our frame panels together where the bin will be located. We chose an out-of-the-way spot that is somewhat protected by tree cover. This will help shelter the pile from getting too much rain, as well as too much sun, which can dry out the pile. We’ll connect the side frames to the back using galvanized “L” brackets. One at the top and another at the bottom should do it. Be sure to position the panels so the hardware wire cloth is on the inside of the bin. For the front, we’ll use hook and eye latches so the front panel can be easily removed to turn the compost and leaf mold.
Now all we have left to do is fill our bins with the right ingredients. For the compost, we’ll need both brown and green ingredients. For the brown, we’ll use these fallen leaves. For the green, some fresh grass clippings. We’ll also throw in some kitchen scraps for good measure. For our leaf mold pile, we’ll just fill it with decaying leaves left over from winter. Some compost starter mixed with water poured over both piles will help get everything cooking in no time. All we have to do is mix it all together with this composting fork and remember to turn it regularly.
There you have it. A compost bin that will help you dispose of your lawn waste while providing an all-natural mix of nutrients for your lawn and garden.
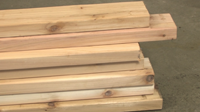
Use cedar two-by-fours. Cedar is naturally rot and decay resistant. Choose the right length depending on the size of your compost.
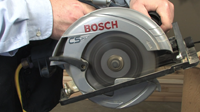
Cut the cedar to the proper length.
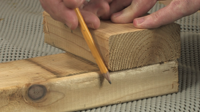
Use a scrap piece of wood to draw a cut line.
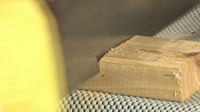
Draw a line halfway down the side of the board and cut with a saw to that point.
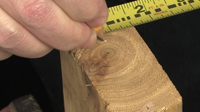
Draw another half-length line on the end of the board.
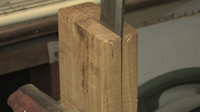
Use either a hammer-and-wedge or a saw to cut the piece off. This will create a lap joint. Repeat steps 3-6 for all boards.
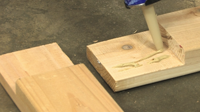
Glue lap joints together.
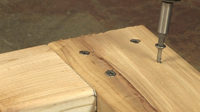
Drill four screws into the corners of each joint.
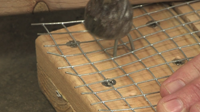
Layout wire mesh and nail to the borders.
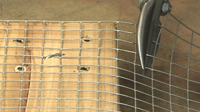
Cut the wire mesh to length.
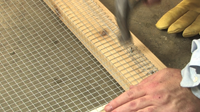
Bend the wire ends back, and secure with a galvanized staple every 6 inches. Repeat on all edges of the frame.
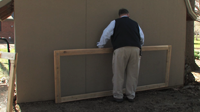
Choose a shady spot to protect from too much rain or too much sun.
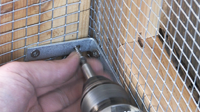
Join the frames together with L-brackets. Make sure the metal mesh is facing the inside of the container.
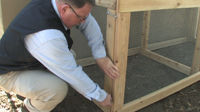
To create a hinged door, add hook and eye latches on the desired side.
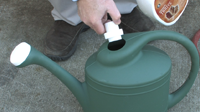
Create the compost using a combination of dead leaves, cut grass and kitchen scraps. Water regularly with some compost starter mixed in.
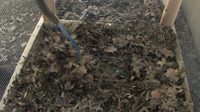
Mix compost with a gardening fork regularly.
Once a week. This will continue to mix everything together and help aerate the pile. If the microbes deep within the pile don’t get enough oxygen,... More »
Brown ingredients are carbon-based materials, such as dried leaves. Green ingredients are nitrogen-based materials, such as fresh grass clippings.... More »
Compost converts waste material into a fertilizer. Bins should be almost 30 cubic feet to ensure it retains enough heat to spur... More »
It will look like rich, organic soil, without any large clumps in it. To test if it’s ready, plant a few grass seeds in a small pot using some of... More »
Some of the common reasons mowers won’t start include the following: 1. It’s out of gas. 2. It’s flooded. Let it sit for an hour or two or... More »
It varies by manufacturer, but some of the more common products require a 30 minute set up time minimum before using. They, you have 2½ hours... More »
A biscuit joiner uses a special horizontal blade that plunges into a piece of wood to create a slot for a biscuit. A biscuit is a football-shaped... More »
If you’re using a C-Clamp, you can simply put two pieces of scrap wood on both sides of the work piece so that any marring of the surface will be... More »
The band saw blade makes a continuous loop and cuts by spinning in a circle. It can handle thick pieces of material, up to 6” thick. A scroll saw... More »
Use either red cedar, white cedar or redwood. All of these are proven to be both decay and... More »
Ever wonder how wood is joined together to make things like picture frames and table tops? While we’ll leave the more sophisticated methods to... More »
Teaching children about wildlife is easier than you think. And it’s as easy as learning about the birds in your own backyard. In this video... More »
Gardening can be tricky. You need the right type of soil and the right amount of sun. A raised-bed garden is many times an ideal choice. In this... More »
Outdoor power equipment can make yard work much easier and more enjoyable. It also cuts down the time you spend working in the yard to give you more... More »
Your yard was the envy of the neighborhood this year. But now it's time to pack things up for the winter season. We'll show you the steps to prepare... More »
While at times she can be hard to buy for, your mother deserves something special and unique for that upcoming birthday or Mother’s day. Why not... More »