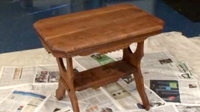
In this first episode in our 2-part series on refinishing an antique, we’ll show you how to remove the existing finish and get it ready for sanding and applying a new finish. When you're ready to move to the next phase, watch part 2: "Applying a New Finish."
Whether it’s an antique table, a rocking chair or a dresser, you’ve probably thought about refinishing that family heirloom at one time or another. Just think how nice this antique end table would look in your bedroom. It will make the perfect nightstand. While it’s far from heirloom quality right now, this solid wood piece is really in pretty good shape. All it needs is some TLC, which in our case means stripping off the old coat of stain and varnish and preparing it for a brand new finish.
In this first episode in our 2-part series on refinishing an antique, we’ll show you how to remove the existing finish and get it ready for sanding and applying a new finish.
So let’s get started.
Before starting any furniture refinishing project, carefully assess the piece to make sure it’s a good candidate for refinishing. Sometimes, the distressed antique look carries a certain charm that may be lost when refinished. Judging by the stains and blemishes on the top of this table, however, a good refinishing is exactly what’s needed to return this piece to its former glory.
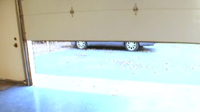
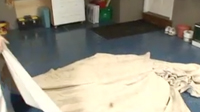
Since we’ll be working with paint- and stain-removing chemicals, we’ll start by making sure the work area is well ventilated. Opening the garage door as well as this window will supply our work area with plenty of fresh air. We’ll also spread out this drop cloth, as well as some newspapers, to protect the garage floor from the harsh chemicals we’ll be using. As for protective safety gear, these safety goggles and a pair of chemical-resistant gloves are a must. If paint remover can blister a 100 year-old finish, it can do the same to your skin.
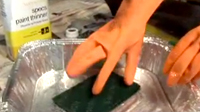
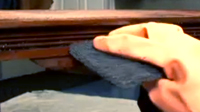
Before we start removing the existing finish, we’ll clean the entire piece with paint thinner and some scouring pads. This will help our paint and varnish remover work more effectively by cleaning the piece of any grease or wax that the stripper might have trouble cutting through. Now we’ll dry it off with some cotton shop towels.
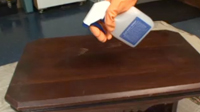
To start the stripping process, we’ve selected a chemical paint, stain and varnish remover to do the heavy lifting. This particular type comes with a spray bottle to apply it to both vertical and horizontal surfaces, as it turns to a sticky gel after it’s applied.
Be sure to read and follow the manufacturer’s instructions carefully when using any type of chemical stripper. And remember, there are also water-based citrus formulations available that are more environmentally friendly. See our list of frequently asked questions to choose a paint and varnish stripper that’s right for you.
First we’ll pour some into the bottle and then spray the entire piece, working in manageable sections, starting at the top and working our way down. Spray the surface with a generous coating of stripper, paying special attention to the detailed areas, like these decorative carved moldings you see here. You may also want to spread the stripper on the piece with a disposable paintbrush to ensure full coverage in all the crevices. Just be sure to use one with natural bristles.
Now comes the most important part of the finish removal process … patience. According to the manufacturer’s instructions, we need to wait a full 15 minutes to let the stripper do its job. This will give us time to get our scraping tools organized.
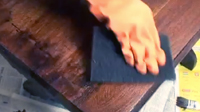
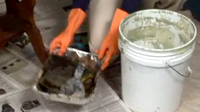
After 15 minutes you’ll see that the existing finish has become soft and has started to blister and peel away from the wood. Now, with either a plastic scraper or one with a dulled blade and the edges filed down, start removing the layers of the old finish, carefully discarding the waste in a disposable aluminum cooking pan. Be sure to have plenty of rags handy. This is when you’ll really need them. Once you’ve removed all you can with the putty knife, spray some more chemical stripper on the tough spots and rub the area with some steel wool soaked in stripper. You can use either regular steel wool, synthetic steel wool or this abrasive stripping pad designed specifically for this application. The edge of the pad really helps work the old finish out of these grooves. And remember, it may take several tries to remove the finish from some of the more stubborn areas.
When you’ve removed all of the existing finish you can, clean the entire piece with steel wool and lacquer thinner. It will remove and neutralize any remaining stripper so it won’t tarnish the finish coat. Using a solvent-based cleaner like lacquer thinner will also prevent the wood grain from being raised, which might happen if we were to rinse the piece with water. This will help make sanding easier in the next episode.
Before you wrap up for the day, be sure to properly dispose of all the chemical soaked rags, steel wool and brushes, as well as the old finish you removed, according to the manufacturer’s instructions and local regulations. Now it’s time for some more patience, as the piece needs to thoroughly dry before you start sanding. It’s best to wait a full 24 hours.
There you have it. Now that we have stripped the old finish and cleaned the surface, we’re ready to sand it and apply a new finish that will bring out the beauty in this timeless piece. We’ll save that for the next episode.
Read Video Transcript
